You haven't signed in yet, you can have a better experience after signing in
*Please complete the payment within {{receiveCouponInfo.expire_at}}Previous use*
You haven't signed in yet, you can have a better experience after signing in
 RollBack Rx Professional 12 Computer System Recovery and Restore Tool Software
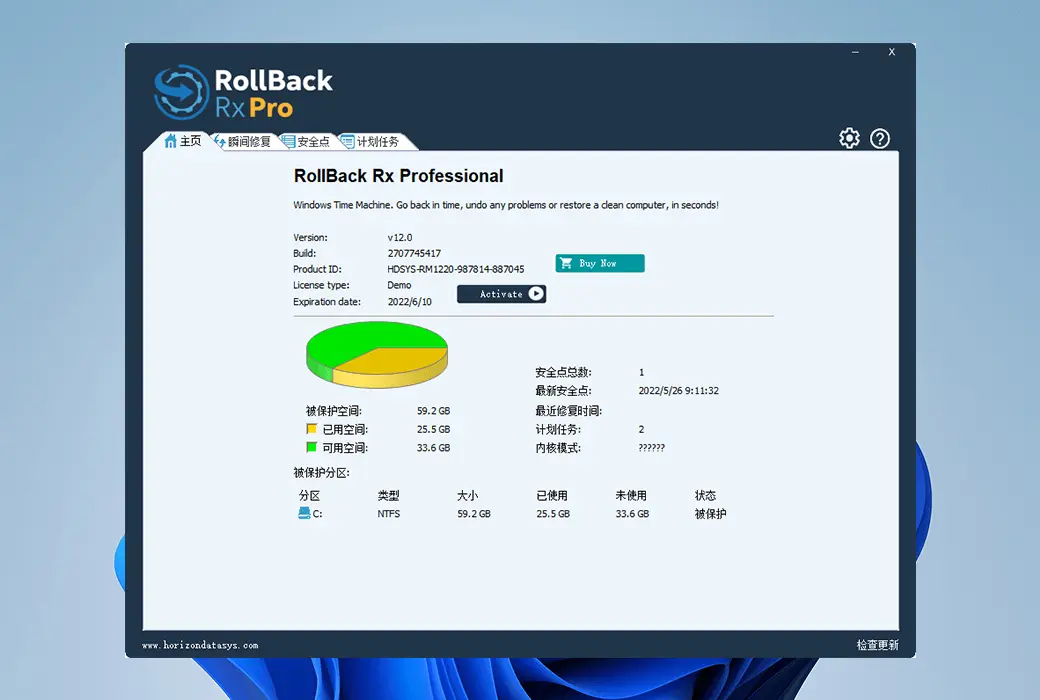
Activity Rules
1、Activity time:{{ info.groupon.start_at }} ~ {{ info.groupon.end_at }}。
1、Activity time:cease when sold out。
2、Validity period of the Group Buying:{{ info.groupon.expire_days * 24 }} hours。
3、Number of Group Buying:{{ info.groupon.need_count }}x。
Please Pay Attention
1、Teamwork process: Join/initiate a Group Buying and make a successful payment - Within the validity period, the number of team members meets the activity requirements - Group Buying succeeded!
2、If the number of participants cannot be met within the valid period, the group will fail, and the paid amount will be refunded in the original way.
3、The number of people required and the time of the event may vary among different products. Please pay attention to the rules of the event.
RollBack Rx Professional is an instant time machine suitable for your PC.
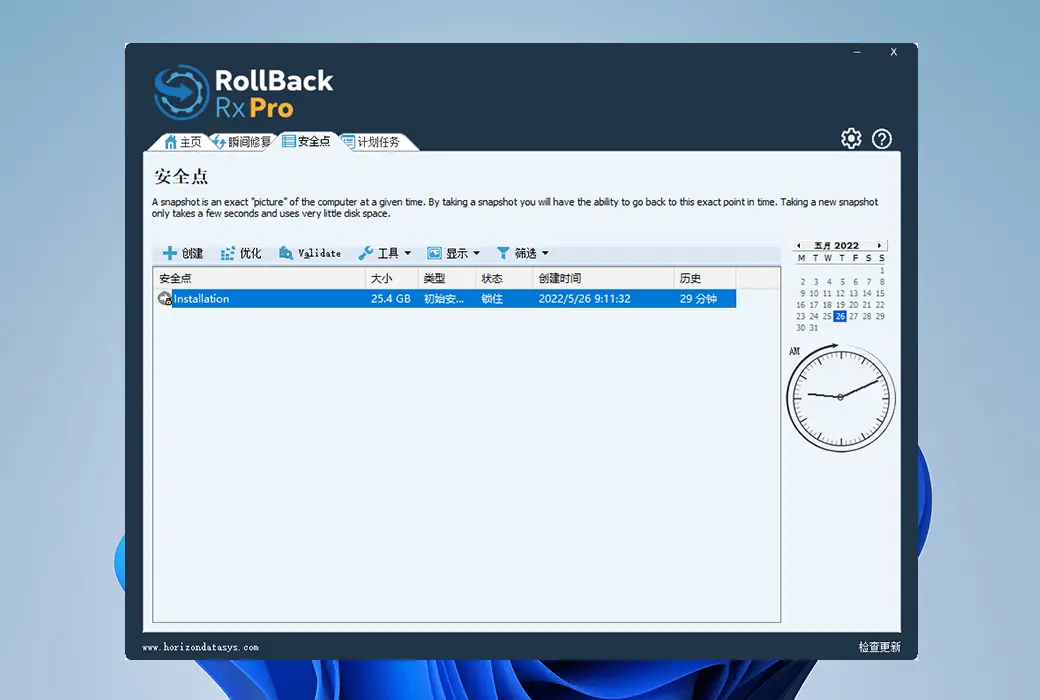
A comprehensive Windows system restoration solution that enables users and IT administrators to easily restore their PCs to any previous state in seconds.
RollBack Rx Professional provides a new PC management method. Any unforeseeable event, such as user error, virus, or even poor software installation, can be easily and absolutely reversed in a fast and effective manner.
Functional Features
Why choose RollBack Rx Pro?
Windows System Restore only restores Windows system files and some program files. In addition, if Windows crashes to the point where Windows itself cannot start (such as BSOD), you will not be able to access the Windows system restore point. In contrast, RollBack Rx technology works at the sector level of hard drives and restores everything! Until the last byte of the data. It is located below Windows, so even if Windows crashes, there is a sub console (mini operating system) that starts before Windows. This allows you to access the rollback Rx and return to the point in time when the system is running without failure.
Most backup technologies, such as imaging, are static and time-consuming. This task is so arduous that even disciplined IT departments rarely have time for regular backups. If a disaster occurs, the length of backup time directly determines the amount of data loss. In today's computing environment, 98% of PC disasters are micro disasters (malware, poor Windows updates, software installations, etc.). How do you protect yourself from the vast majority of PC disasters?
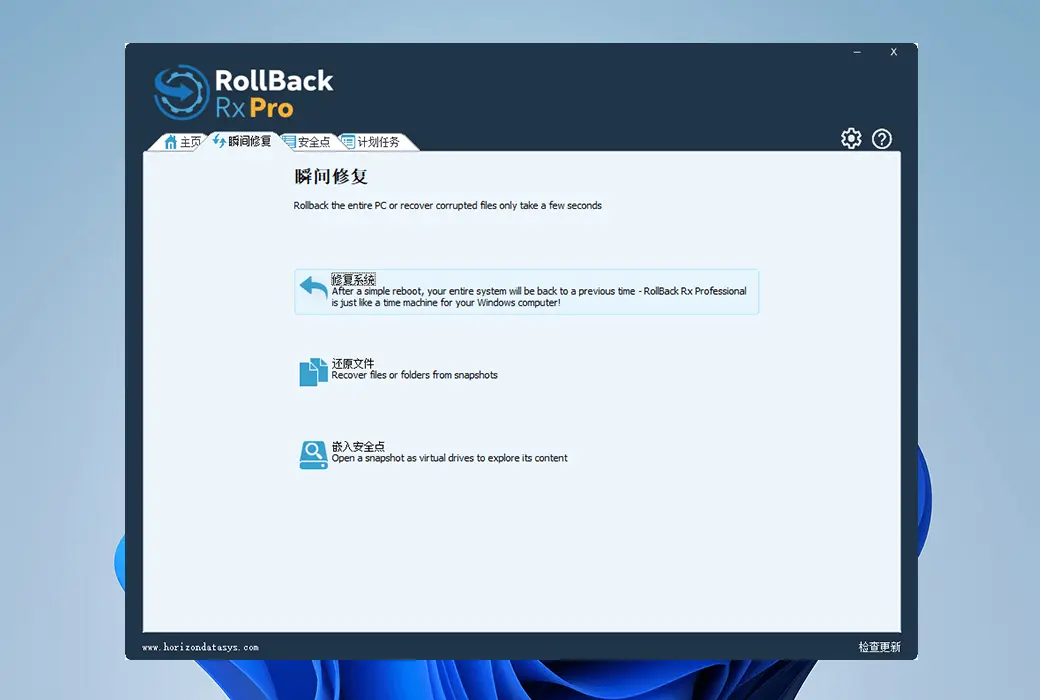
RollBack Rx is a dynamic instant recovery solution. It can automatically take silent snapshots in the background. Each backup snapshot only takes a few seconds. When you want to restore your PC, you can quickly return to any previous state within the time required to restart the PC.
Most uninstallation software, including Windows' built-in add/remove programs, are fragmented solutions. When uninstalling an application, there may still be residual programs; As for what content to keep and what content to actually delete, you are indeed at the mercy of the software author. Only by rolling back Rx can your workstation be restored bit by bit to any previous snapshot. The problem with antivirus programs is that, by design, they are always catching up. Continuously attempting to identify and remove known threats and update their definition files. However, when the virus does strike, you can trust RollBack Rx to completely undo the infection and restore your PC to its pre virus state. RollBack Rx is widely used for securely testing software. Enable you to test the software without compromising system integrity.
Assuming you are dealing with an important document. Then, while checking your inbox, you encountered a catastrophic system crash and your PC became completely unusable. Unfortunately, the last snapshot was taken a week ago... RollBack Rx technology allows you to return to the system state from a week ago without losing any data in the current (crashed) system. How is this possible? The file recovery function helps access any file from a crashed system state, including important documents you are working on. For organizations that require zero day disaster recovery without downtime, this feature is absolutely necessary. RollBack Rx improves work efficiency, allowing IT administrators to restore PCs to a fully functional state within minutes without losing data.
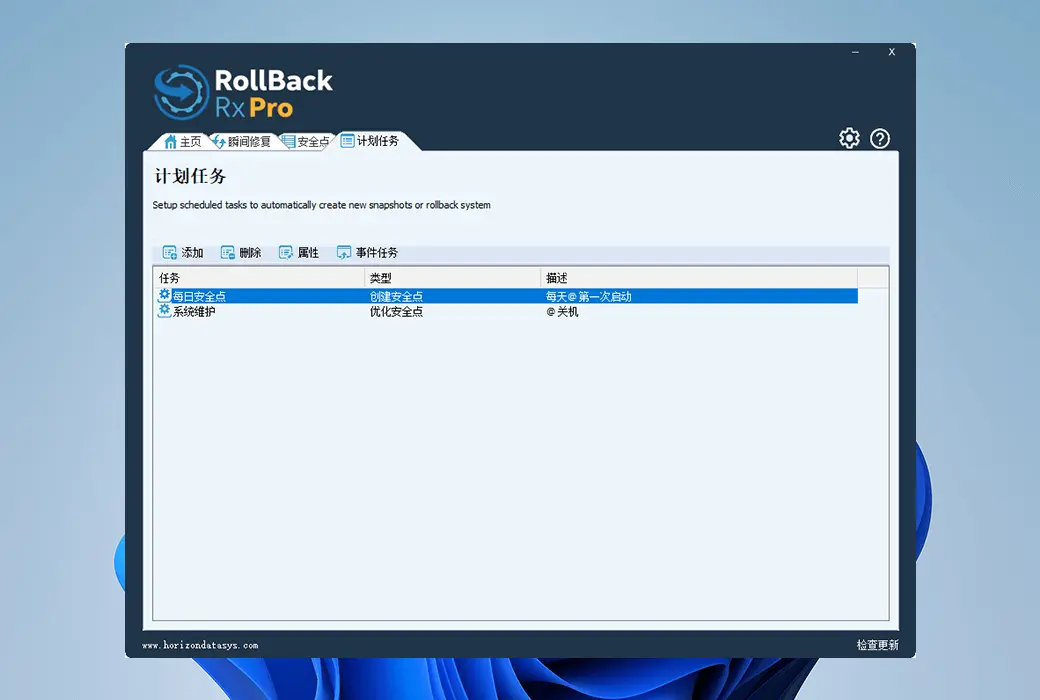
RollBack Rx simplifies enterprise level network management. Horizon DataSys provides a free network management console for all RollBack Rx clients. The Remote Management Console (RMC) enables IT administrators to remotely manage, configure, and control all RollBack Rx client installations, simplifying the tasks of network administrators. RMC remotely enables all client based features through LAN, WAN, and even the Internet. For more information about RMC, please click here.
Official website:https://horizondatasys.com/rollback-rx-time-machine/rollback-rx-professional/
Download Center:https://rollback-rx-pro.apsgo.cn
Backup Download:N/A
Delivery time:Manually processing orders
Operating platform:Windows
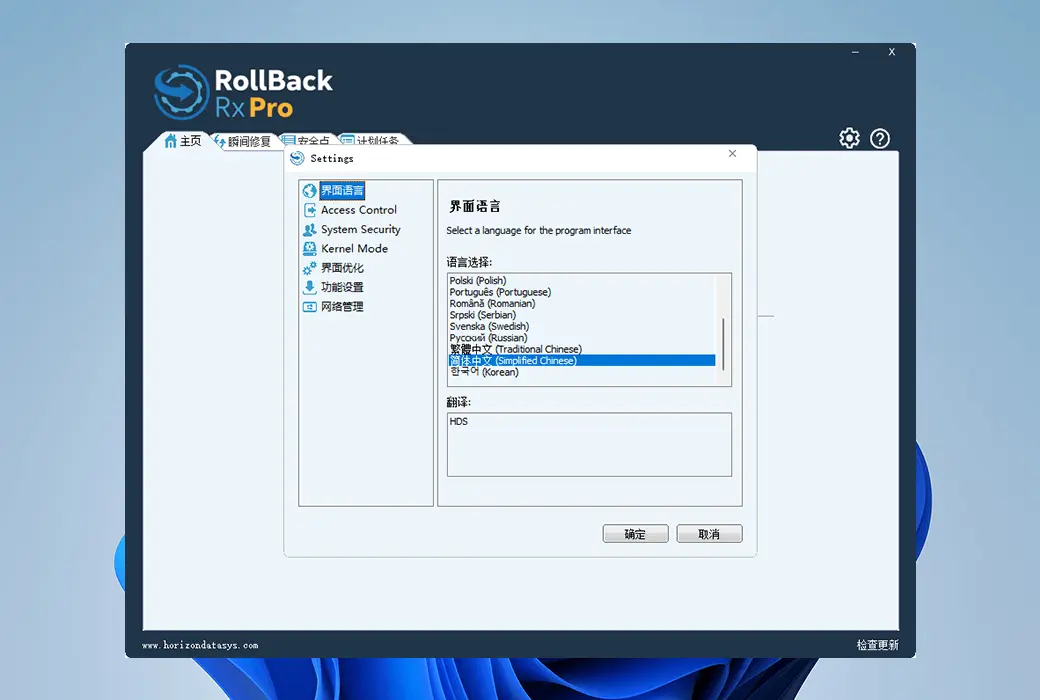
Interface language:Supports Chinese interface display, with multiple languages available.
Update instructions:During the maintenance period, all versions of updates and upgrades are supported, and after the maintenance period, only minor version updates (v12. x) are supported.
Pre purchase trial:Free trial for 14 days before purchase.
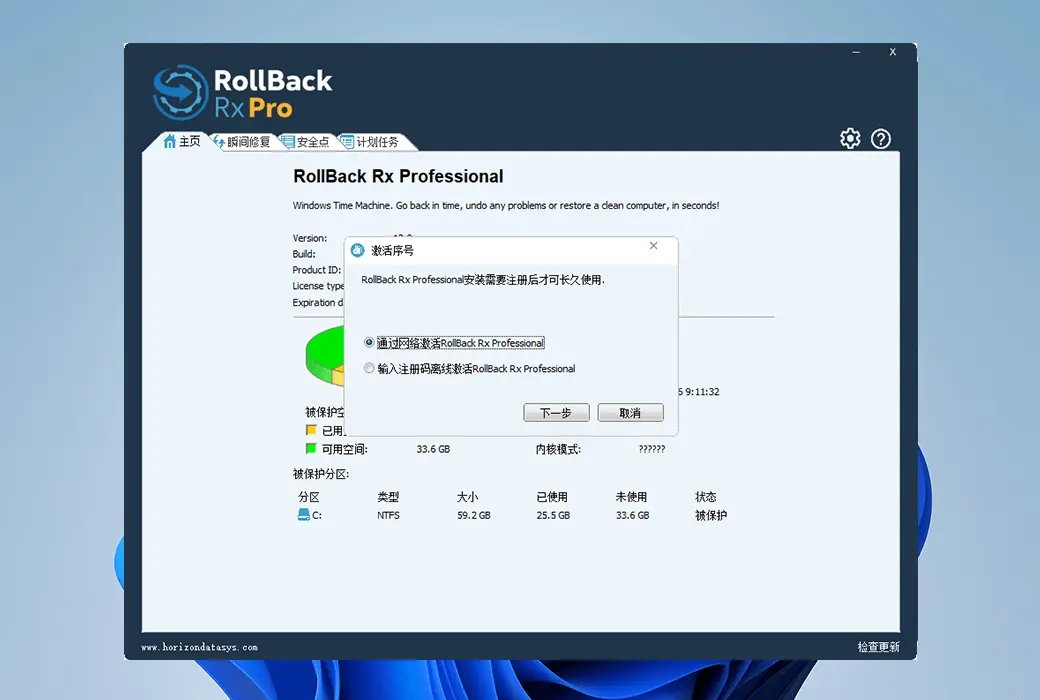
How to receive the goods:After purchase, the activation information will be sent to the email address at the time of placing the order, and the corresponding product activation code can be viewed in the personal center, My Orders.
Number of devices:Can install 1 computer.
Replacing the computer:Uninstall the original computer and activate the new computer.
Activation guidance:To be added.
Special instructions:To be added.
reference material:https://support.horizondatasys.com/Knowledgebase/Article/View/52/0/software-upgrade-policy

Any question

Install EndPoint Manager (EPM)
Therefore, you have just installed RollBack Rx Pro or Reboot Restore Rx Pro on the end-user computer. Its configuration is completely according to your wishes, and you have run the initial tests and the program is running well. As you prepare to return to your desk for a fresh cup of coffee, you realize that there is still one final step left before finishing work- Install the free centralized management tool EndPoint Manager (EPM).
Fortunately, installing and running EndPoint Manager is as simple as setting up the program itself, or even easier. After reading this quick guide, I believe you will have confidence in using this tool.
Firstly, when you download either of the two programs from our website The zip file will contain a second folder labeled 'EndPoint Manager'. If you have downloaded the program, please make sure to unzip this folder and then open it.
Run Setup. exe (Application). The x64.exe application should be reserved for installations that fail when running Setup. exe.
Installing EndPoint Manager does not require a restart. So don't worry.
Following the instructions on the screen, you should be able to complete the installation program in a few seconds. Please ensure that you have both Service and GUI installed.
Connect the client PC to EndPoint Manager
To connect PCs to EndPoint Manager, you must configure them to point to the IP address or computer name of EndPoint Manager.
(1) First, find the IP address of the PC where EndPoint Manager will be installedhttps://support.microsoft.com/en-us/windows/find-your-ip-address-in-windows-f21a9bbc-c582-55cd-35e0-73431160a1b9
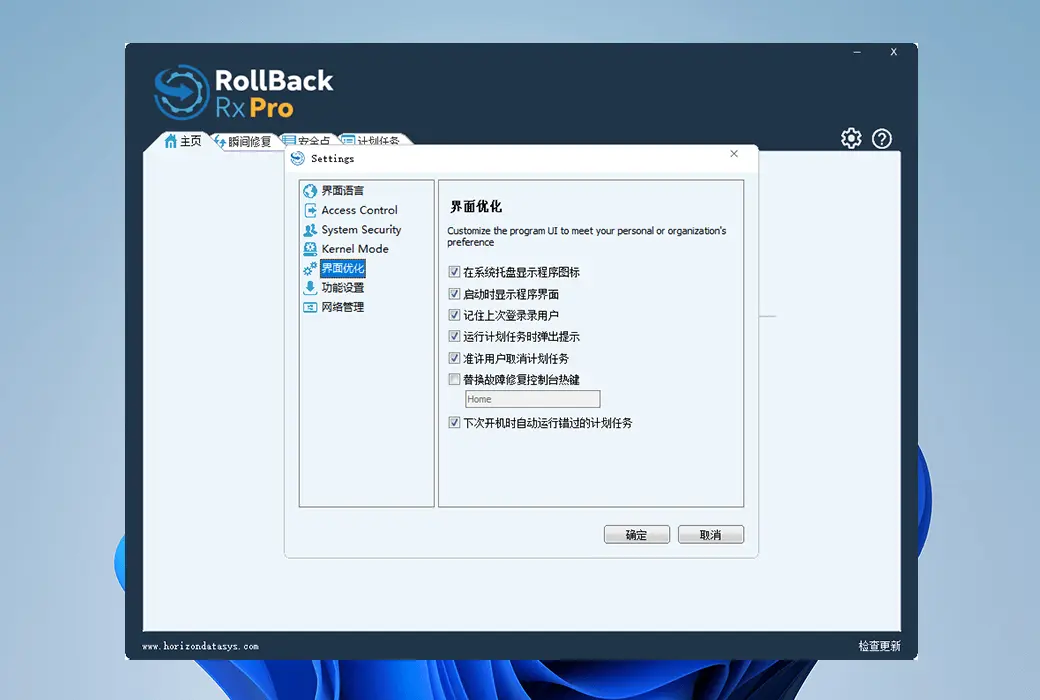
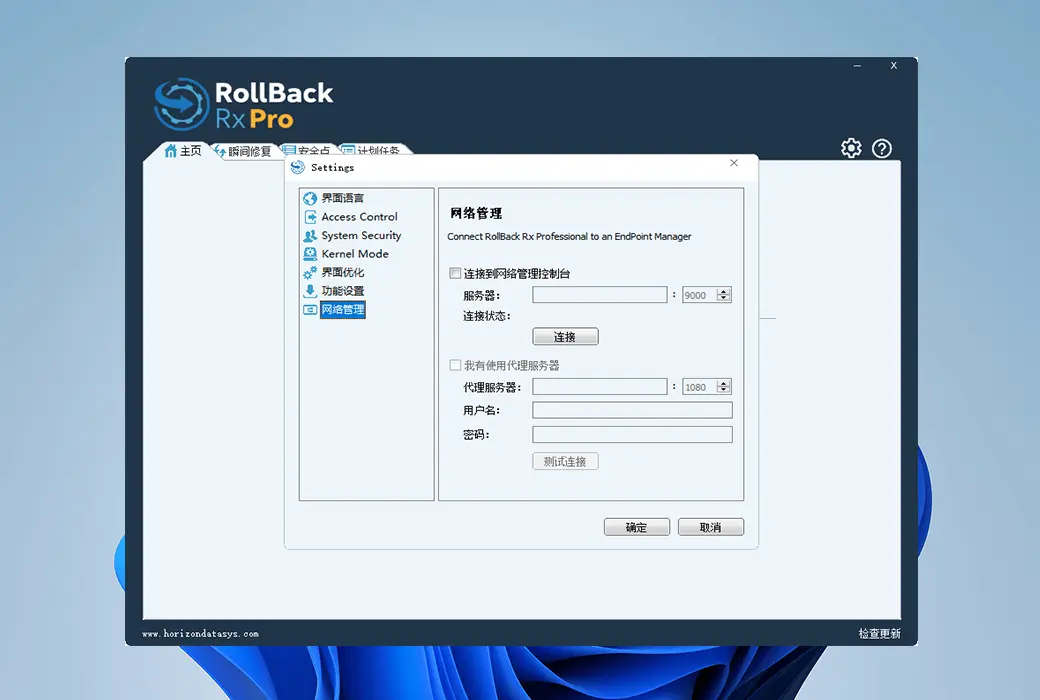
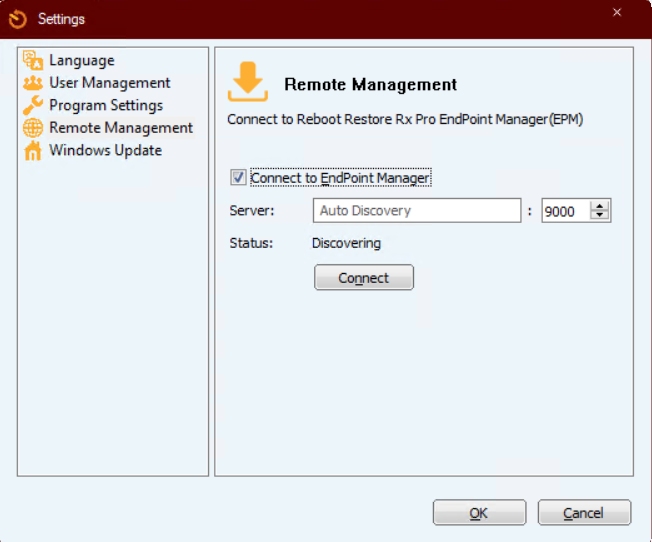
(2) Next, go to the client PC and open the RollBack Rx Pro/Reboot Restore Rx Pro client>; Go to Settings (Gear/Gear Icon)>; Remote management
(3) Select 'Connect to EndPoint Manager' and enter the IP address of the EndPoint Manager PC>; Then connect
Note: For large-scale deployments, you can use SETUP to pre configure clients to connect to specific IP addresses. The INI wizard is located in the deployment tools folder of the installation package. Additional instructions: Starting from version 12.8
There is now an 'auto discovery' feature that automatically connects client PCs to PCs with Endpoint Manager installed as long as they are on the same local network
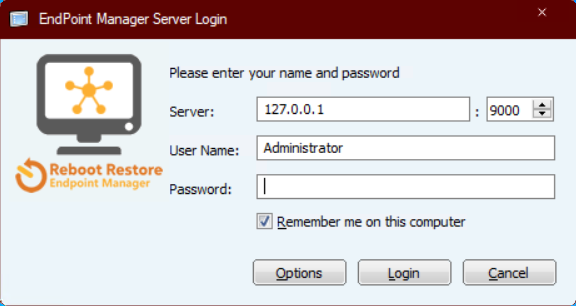
The next step is to run EPM itself. Open the program from the newly created desktop icon, and you will see an introduction screen that requires you to enter your username and password, as well as the server IP and port. By default, this will be set to localhost IP (127.0.0.1) and TCP port 9000. If you are running EPM Server and GUI from the same computer, these default settings are sufficient. If you are running the server control section on another PC, please enter the IP address or machine name of that computer to connect.
Note: The username and password requested here are different from those set for the end user.
By default, the username is Administrator and the password is left blank. Click login to enter RMC.
Now we have started, as you will see, the layout of the EPM tool is very simple. There is a default group on the left and a display screen on the right (which can be easily adjusted to fit your preferred style) that highlights all connected PCs. Online users will be in color, while offline users will display grayscale.
start
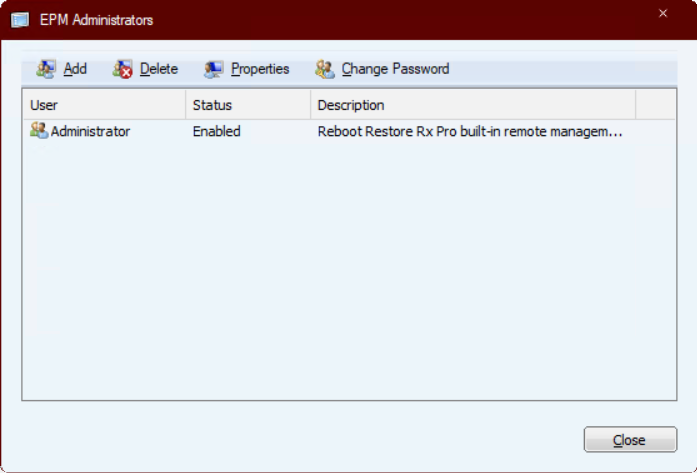
The first thing a network administrator or system administrator may need to do is set a username and password for EPM itself. To do this, click on EndPoint Manager in the upper left corner and select EPM Administrator from the drop-down menu. A new window will appear listing the current Administrator. If you wish to start creating administrators or users with different permissions, simply click Add and fill in the requested properties.
To change the settings of an existing user, highlight the user and select Properties, or select Change Password to update the password.
Please note that by default, administrators do not have a password, so you may want to update your password immediately to include one.
Now that our users have completed the configuration, it's time to start setting up our workstation. The first thing we should do is to put end users into appropriate groups.
Group settings
By default, multiple built-in groups filter clients based on their Windows operating system, activation status, current online or offline status, and a single group that includes all clients.
If you wish, you can also create a group by right clicking on the blank space on the left menu and selecting "Add Group", or by clicking RMC and selecting "Add Group" from the drop-down menu. Complete this task by naming the group, writing a description, and selecting OK.
By dragging and dropping the client into the corresponding group, you can add the client to your group. The same method can be used to delete the client, or right-click on the desired PC and select 'Remove from Group' from the drop-down menu.
You can also delete a group from the EPM menu, or right-click on the group and select 'Delete Group'.
Combining PCs together makes it easier to manage clients in the group.
Tip: Go to View>; Switch to column view to display more information about the connected client PC in Details. You can also go to View>; Choose Details to select from the column view
Displayed content Taking Control
You have set administrator privileges and connected to the PC, and placed it in the corresponding group. Now, you can manage the machines as you please.
EPM can be configured to issue commands to a single PC by highlighting a command, right clicking and selecting one of several available options, such as taking a new snapshot, rolling back the system, deleting a snapshot, shredding, issuing a command, sending a file, remote connection (using UltraVNC), closing, restarting, locking the screen, or completely changing the configuration settings of RollBack Rx Pro or restarting to restore Rx Pro settings by selecting "Modify Client".


As you can see, the Client Settings menu allows you to fully control the functionality of the program, from its appearance to the end user, and then to the program's execution. This is one of the most useful tools RMC has, as it allows for quick changes to be posted to connected users in real-time without the need to physically visit each computer. These can be published separately, issued to groups, or simultaneously published to all connected computers.
stay informed
Administrators may wish to stay informed about the program at any time, and we offer two tools to provide insights: 1 Alarm settings, and 2 Event logs.
You can find the alarm settings by selecting the RMC button and clicking on "Alarm Settings" from the drop-down menu. After selection, a new window will appear with several different options for sending emails to the administrator, such as if the client has been offline for a while or if there is not enough available space on the drive.
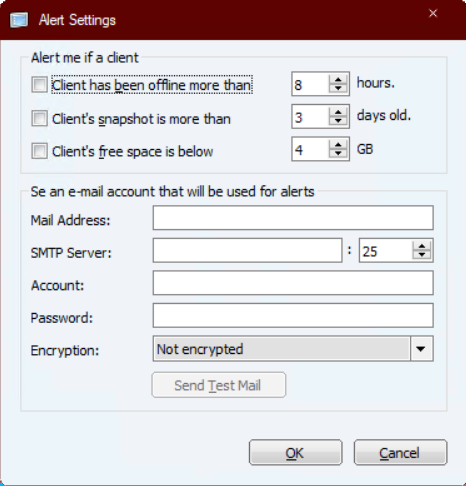
By entering the activity email address, EPM will publish information based on these options, enabling administrators to stay informed of all connected clients in a timely manner.
You can closely monitor the functionality of EPM and its connected PCs through event logs. This information is crucial when solving any problem. You can find the log by selecting the EPM button and clicking on 'Event Log' from the drop-down menu.
Choosing 'Save As' will export the data to a'. log 'file, which can be easily sent to those who may need it.
Finally, let's export customer information. RMC allows users to export all connected client PC information to an XML file. This can be found by selecting the RMC button and clicking 'Export client to XML' from the drop-down menu. Here, the administrator needs to enter a name and select the save destination, then click Save.
Note: After exporting the XML file, you can change the file type to CSV, This may make the data more readable.
🔗 Source text from:https://support.horizondatasys.com/Knowledgebase/Article/View/endpoint-manager-starter-guide